How to Take Better Photographs of Your Car for Selling Online
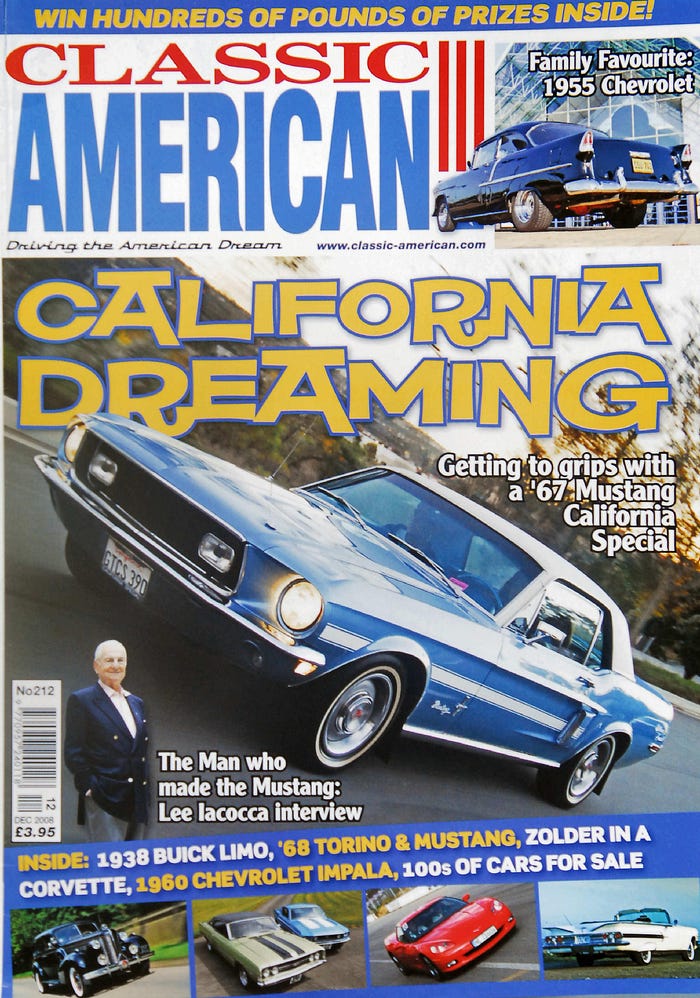
More than a decade ago, I wrote a story called Automotive Photography for Dummies (a play on the …for Dummies series of books popular at the time) for Classic American magazine in the UK that was quite successful.
Originally, it was written for car enthusiasts who wanted to see their car featured in their favorite automotive magazine. But it was also helpful for people selling their car through one of the high-profile auction houses like Gooding, RM Sotheby’s, or Russo and Steele.
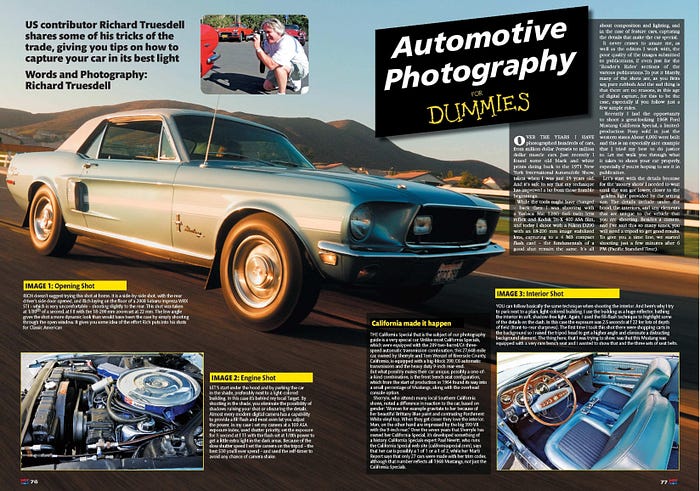
But in reality, that six-page feature reached a pretty small target niche of potential readers. A far larger audience are those people selling their car online — specifically through eBay, Craigslist, or other online selling platforms — that want to present their car in the best possible light. So this how-to feature was aimed to reach this far-larger potential audience.
Just a quick background on me. First, I’ve been a gearhead (car enthusiast) my entire life, well before I could drive. Now, I’m a professional automotive photojournalist (approaching semi-retirement). Over the past 20+ years, I’ve produced more than 1,000 automotive features for magazines around the world, written three automotive books through traditional publishers including the 2012 best-selling Hurst Equipped, more than a dozen self-published print-on-demand books sold through Amazon, and countless web-only features. I’ve been taking photographs of cars since I was 10 years old when my parents gave me my first 35mm camera for my 10th birthday in 1964. That was 55 years ago.
So here is an updated version of “Automotive Photography for Dummies.” If you’re about to sell your car and wish to present it in the best possible light, this article is for you.
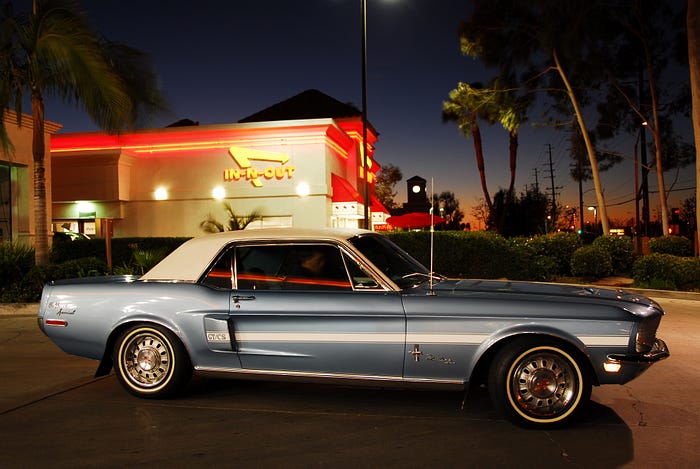
The subject for my original 2008 feature was a great-looking 1968 Ford Mustang California Special, a limited-production pony car sold only in the western states. About 4,000 were built. The car I photographed was one of the most accurate restorations I’ve seen up to that time of that unique and relatively rare Mustang.

When I updated feature, in 2010 for Chevy Enthusiast that I served as editor, I selected a 1941 Chevy truck that has been in the same family since it was new.
And, as with my previous article, I’ll walk you through here all the steps that make up a complete magazine-level photo shoot. With proper planning, the process can be compressed into a two-to-three-hour period.
(Update note — the biggest change in this process, from when I wrote this story first in 2009 and updated it in 2010, is the equipment you might use. Even back in 2010, the camera sections in most mobile phones, with the possible exception of an iPhone, simply wasn’t capable of serious results. In the 10 years since then, most current smartphones have camera sections that rival those found in under-$100 digital point-and-shoot cameras — in fact, they have all but killed off that product category — and some super high-end, over $1,000 smartphones with three or four separate cameras, can produce images that rival a $500 D-SLR or one of the new breed of mirrorless cameras.

The OnePlus 7/ 7T Pro is a good example of one of these multi-camera smartphones.
Still, because dedicated cameras still give you much more manual control over the combination of shutter speed and aperture, they remain a better option for getting the best possible images. So unless you have a high-end smartphone with full exposure control, a dedicated camera will still provide the best results.)
Let’s start with a basic rule: For what the pros like to call the “money shots,” wait until the sun gets lower so that you can take advantage of late afternoon’s golden light, typically within 60-minutes of sunset. Never — and I do mean never — shoot at mid-day when the sun is high. Unless you’re blessed with overcast skies, you’ll almost always get unsatisfactory results, with way too much contrast wiping out much of the details you’re trying to capture.
Schedule your photo session by working back three hours from sunset. Check SunriseSunset.com to determine the time in your area, or Google “sunset times” plus your city for a variety of sites to help you identify exactly when the sun sets in your region. I photographed this Chevy truck in August in Southern California with sunset just before 8:00 p.m. I met the owner, John McCallister, at 5:00 p.m. at his shop, knowing that would give us ample time to get in all the necessary shots without rushing ourselves.
If you’re an early bird, you can also shoot at sunrise. (But I try to avoid shooting at sunrise as it usually involves a 4 AM wake-up call.)
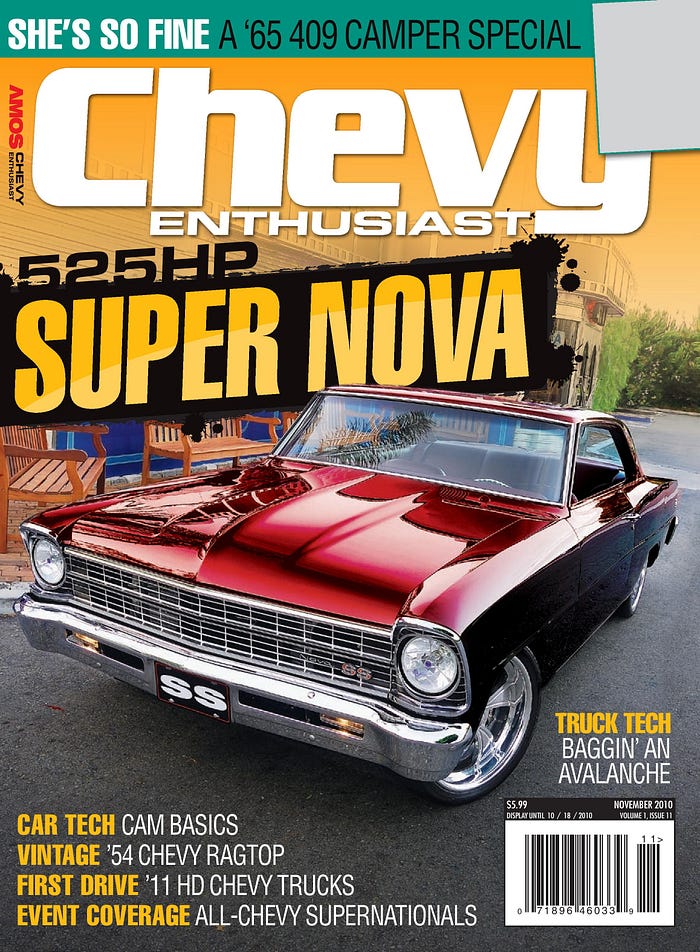
Here’s an example of a sunrise shot, the next-to-last cover of Chevy Enthusiast, shot at 6 AM at the Studio Diner just north of San Diego.)
Setting the Agenda
Great automotive photographs require a plan. Once you’ve scheduled your day and time, draw up a shot list to guide you. While I might take up to 150 individual photos in a single session, I’ll submit a fraction of that total to my editor, of which at most a dozen will end up being used in the final layout.
A typical shot list for a typical six-page magazine feature would include:
> A selection of full-vehicle, static-exterior shots (front three-quarter, side profile, rear three-quarter, direct front, direct rear)
> A selection of exterior detail shots, such as the Art Deco-style grille, the door handles, and the bed
> A selection of photos of the full engine compartment, as well as close-ups of any unusual details (such as a period-correct battery)
> A selection of interior shots with a full view, as well as the dash details and switches
> A selection of car-to-car tracking shots
The same shot list, with the exception of the tracking shots, is the portfolio you’ll want for your eBay or Craigslist marketing efforts.
For this project, we got the car-to-car tracking shots in the can first. A car-to-car photograph is the one that many enthusiasts think separates the pros from the amateurs. In reality, taking such photographs is fairly simple and straightforward. The biggest problem is that if you’re doing it on a public road, you run the risk of a being cited for a moving violation if you’re not belted in. If you’re trying this for the first time, I suggest a big, open parking lot on a Sunday morning.
Tracking Shots
While tracking shots are a requirement for publication-grade automotive photography, they are less essential for images produced to simply sell your car. But imagine how blown away someone will be seeing as the first image of your car in an eBay ad or Craigslist listing, if it’s a perfectly executed tracking shot?

In the case of this session, we took the car-to-car photographs late on a Sunday afternoon heading west on Interstate 10 in Los Angeles County. This allowed the setting sun to illuminate the front and the driver’s side of the truck with some pretty light without any annoying shadows. The shots were taken from the passenger-side window of a Dodge Ram pickup owned by one of McCallister’s friends. The camera vehicle was in the middle lane with the target vehicle trailing slightly behind in the slow lane.
Sometimes I will shoot out an open sunroof, first ensuring it is closed as much as possible. If the driver should have to stop short, I don’t want to be ejected Goldfinger-style.
We ran just about at the speed limit, around 60 miles per hour, which is faster than I normally prefer. But with the settings selected — about 1/80th of a second at f 8 — the results were good, with no drivers trailing the Chevy in the picture. We were fortunate to have some trees and sound abatement walls in the background. It’s always best to have something non-disruptive behind the vehicle.
I achieved a good blur effect in spite of the faster shutter speed selected; a fake-looking Photoshop blur was not required. Because of the bounce of the camera vehicle, I was forced to use 1/80th of a second (higher than I wanted). If you look closely at the shot, you’ll see that the depth of field is quite good, front-to-back. This is because I used as my focus point the driver-side front fender.
On a smooth road at slower speeds — say, 25 miles per hour for each vehicle — I could have selected a slower shutter speed, 1/45th of a second with an f-stop setting of f 11 or smaller. (I’m assuming you know how to set your camera using shutter priority, or, if you’re shooting with a fully manual-capable camera like a digital SLR, that you can adjust the setting to get the combination of shutter speed and f-stop that is best for the lighting conditions. See your owner’s manual for specific instructions on making these adjustments.)
One helpful hint here: Compose the shots both horizontally and vertically. A magazine feature’s double-page opening spread requires a horizontal image, with ample room around the vehicle for the art director to work with. My preference is to offset the vehicle to the right. And if you want a shot at the cover, you’ll need some vertical images. Don’t crop too tight. Today’s cameras have so much resolution you don’t need to use each and every pixel as once was the case. (In the early days of digital, pre-1998, I shot a cover with a one-megapixel point-and-shoot camera.)

I use a midrange Nikon D7100 D-SLR with the standard 18–55mm standard zoom lens for most of my work. But you can achieve great results with almost any good point-and-shoot camera that gives you a full manual-override capability.

The new generation of mirrorless cameras like the Nikon Z50, the Olympus OM-D E-M5 Mark III, the Panasonic Lumix GX80/GX85, and the Canon EOS RP.
(An excellent mirrorless 2020 buyers guide has been produced by Engadget and can be viewed here.)
And of course, if you have a high-end smartphone, and you are well-versed in its manual or user-set capabilities, you can get similar results. The great thing about modern digital cameras is that you can review your photos as you take them.
After I get the first sequence of tracking shots, I always review them on the camera’s LCD screen, zooming into the front license plate of any badging on the front third of the vehicle. If it looks sharp and crisp, I move on to the next shot on my list.
Detail Shots
In this session, the detail shots will be what you need most for your marketing images. Normally I try to find a clean, white building, typically in an industrial park, to get the detail shots. This allows me to park the vehicle in the shade so my shots aren’t impacted by harsh shadows that conceal the details.

The art deco-style of the Chevy’s grille is a dominant exterior design element of the Chevrolet trucks of the immediate prewar era. This shot, with the containing horizontal lines of the restaurant in the background, worked for me in place of just a blank background.
This gives me the chance to talk about the importance of the most important tool you’ll need to achieve professional results: a tripod, the best $30 you’ll ever spend on your photographic gear.
By the time we started with the detail shots, it was around 6:30 p.m. This meant I could set the camera on the tripod, using the camera’s built-in meter to set my initial exposure. Then I adjusted the shutter speed to a slower setting, which allowed me to use a smaller aperture for good depth of field, resulting in crisp, sharp images.

Let’s start under the hood. One trick I like to use, especially working in the shade with shutter speeds of 1/2-second or slower, is to use a bit of fill-flash. Most cameras, even point-and-shoots, offer this capability to dial down the output of the camera’s built-in flash. The feature varies by camera so the night before your planned photo session READ YOUR OWNER’S MANUAL. I can’t emphasize this enough.
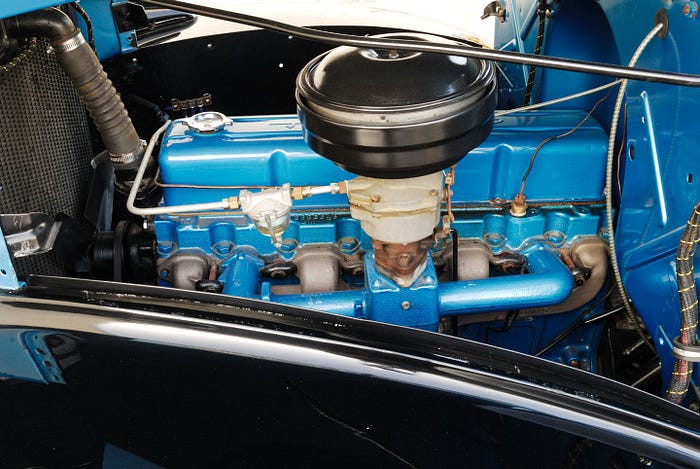
Again, using the shutter priority mode, set the exposure for 1/2-second at f 11 with the flash set at 1/8th power to get a little extra light in the dark areas. And use the self-timer capability, even if using a tripod. With long exposures, even pressing the shutter can induce blur to your shots.

You can follow basically the same technique when shooting the interior. And here’s why I try to park next to a plain, white or light-colored building. I use the building as a huge reflector to bathe the interior in soft, shadow-free light.

Again, I used the fill-flash technique to highlight some of the details on the dash. In this case, the exposure was 2.5 seconds at f 22 for lots of depth of field. Vary the height of the camera on the tripod head to get a higher angle and to eliminate any distracting background elements. The important thing here that I was trying to show was that this truck featured a simple dash that was highly stylized with its own art deco-style elements that contrasted with the otherwise spartan look of the interior.
If the undercarriage of your vehicle is noteworthy, shoot it. If you have access to a set of ramps, use them. As it is normally difficult to use a tripod in such situations, a small beanbag can be used to support and position the camera, especially in low-light situations. Use your self-timer to avoid any chance of camera shake spoiling the shot.
Static Exterior Shots
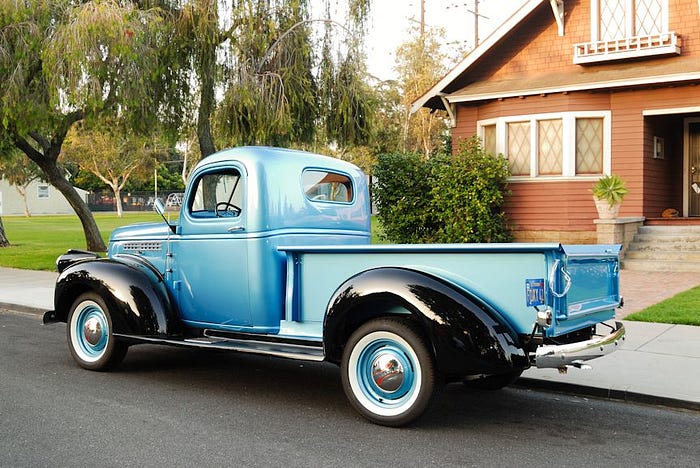
I go for what I like to call a period-correct look in most automotive photo sessions: incorporating background elements that match the era in which the vehicle was built. In this case, the owner knew of a residential neighborhood with pre-War-style California bungalows, a perfect setting for getting the full-vehicle static shots, front three-quarter, side profile, and rear three-quarter. The simple lines of the truck perfectly matched the scene.
As always, I make sure not to fill up the full-frame with the vehicle, leaving room front and rear and offsetting the subject to the right. Think of the frame in sections of thirds. Use the camera’s zoom from wide-angle to telephoto as you move back. This changes perspective and the relationship of subject to background can make all the difference. (The digital zoom on smartphones is not the same thing. That just crops a smaller section of the overall image. Some of the current crop of high-end smartphones offer a true optical zoom but their range is limited compared to the zoom lenses found on D-SLRs and mirrorless cameras.)
Since you have a tripod, don’t be afraid to use it to maximize depth of field, setting a slower shutter speed with a smaller (higher numerically) aperture setting. Also, try using a faster shutter speed with a wider aperture to blur the background in cases where you can move the subject far enough away from the background.
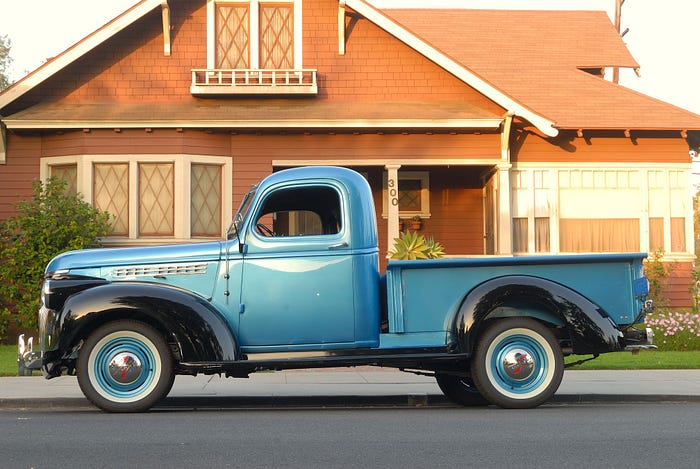
While you don’t usually see straight, side profile shots used in magazine features, when I selected the images for this story, I knew that I would use the side profile shot.
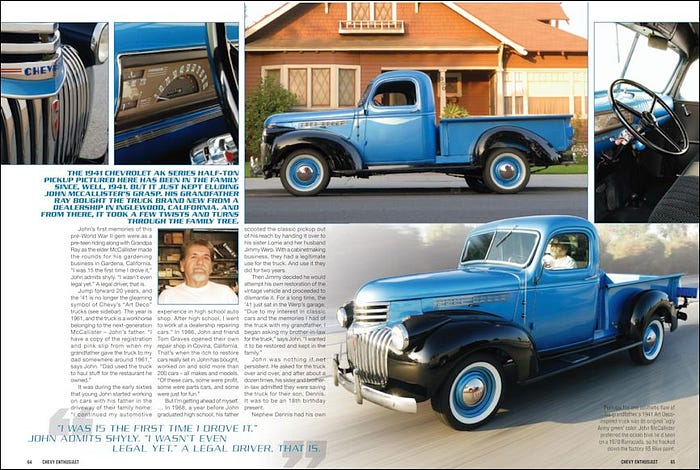
On the page 5–6 spread (but my art director surprised me with the way he put it all together) you see how he laid out the spread using the side profile shot and the tracking sot, overlaying text over portions of the background of that photo in the final layout.
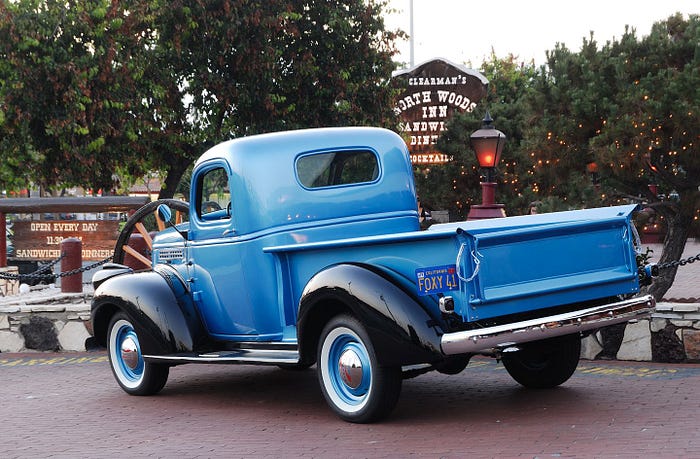
While I was pleased with the results thus far, I didn’t have what I thought would be the knockout opening spread shot. One of the car-to-car shots might work, but they weren’t quite what I wanted. I know of a restaurant in the area that’s been around almost as long as the subject truck. With light fading, we hustled over to Clearman’s North Woods Inn in Covina, California, just minutes before the sun set below the horizon.

After asking the restaurant’s owners for permission to shoot on their property, we positioned the truck in front of the log cabin-style exterior and shot until the sun was below the horizon. There is a period of time, just after the sun sets below the horizon, that the light is optimum (if you’re using a tripod to compensate for the low-light levels requiring shutter speeds below 1/15th of a second).

At this point, the sky acts as a giant reflector. For several minutes, I varied the shutter and aperture settings while shooting the front and the rear of the truck. By the time I stopped, I was using 10-second exposures.

As the opening spread shot shows, the final shots were exceptionally sharp, benefiting from the extremely rich light just after sunset.
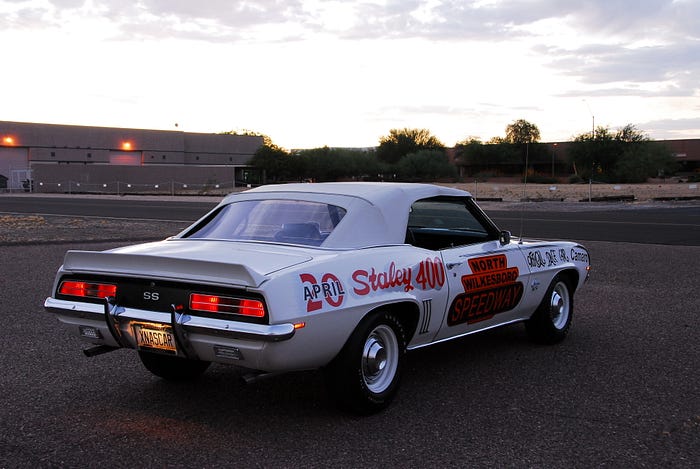
This reminds me of a hard-learned lesson on a previous shoot of a rare Camaro NASCAR Pace Car in Arizona a few years back: With exposures this long, longer than 1/2-second, make sure all the adjustments on the tripod are tight. Even the slightest movement will destroy your shot. Of the 10 shots I took in this sequence, this was the only one that was tack-sharp. The rest of the photos were a tiny bit out-of-focus due to the tripod not being really tight. I got lucky with this shot.
If you look closely at the front and rear fenders, you should be able to tell that on the shot selected, the sun was below the horizon. I was tempted to use a polarizing filter, but the beautiful orange hue of the horizon line would have been lost. One side of me was tempted to smooth out the color transition (and, if these photos were for an advertising client rather than an editorial one, I might have). Yet after having several people look at the layout before it was finalized, I decided to leave the reflected elements in place, even on the rear three-quarter shot on the article’s fifth page.
Back to the Chevy truck photos, by 8:05 p.m., we were finished. I headed home knowing I had a good session captured on my 4GB memory card: The total of 145 photos represented fewer than 30 different shots with numerous combinations of shutter speeds and f stops selected.
Post Production
After a good night’s sleep, I reviewed the photos and selected the 30 best images. I always shoot with the camera set to capture RAW and JPG images at the same time. Then converted the selected images from RAW to JPG to get the best possible results. RAW images use no in-camera processing or compression, so they best approximate what would have been captured as a film negative or transparency.
In the conversion from RAW to JPG (the format most art directors prefer working with), I typically adjust just brightness, contrast, and sharpness (rather than having the camera do it for me on the JPGs already captured) and crop the images where necessary. In the past I avoided any Photoshop effects, leaving such matters to the art director, who is far more skilled in these areas than I am.
But in the years since first writing this story, time (and software) has changed. For image editing, I long used Paint Shop Pro’s various versions. It is simple to use with excellent online tutorials. It now offers a one-click adjustment that applies tone mapping to the image which approximates the look of High Dynamic Range or HDR. Typically an HDR image is a composite of three or more images layered and combined together — some over-exposed , some under-exposed — to retain shadow and highlight detail. Here’s an example of one of the images from this session with very mild tone mapping applied to the same image above.

Since writing this story I’ve found another image editing program to use, ON1 Photo Raw 2020. I love all of the many plug-in presets, called LUTs, many free, that ON1 Photo Raw offers. It has a bit steeper learning curve than Paint Shop Pro, but shorter than Adobe Photoshop. And both programs are less expensive than what is the industry-standard, Photoshop.
Overall, I think the results speak for themselves. If you count the photos in the final layout, you’ll see that just nine were used: the front three-quarter opening spread, four detail shots, the side profile shot, the car-to-car tracking shot (which was the alternative selection for the opening spread), and the inset photo of the owner.
Will having great photos help you sell your car? Sell it faster? Sell it for a higher price? It certainly can’t hurt, right? And the more valuable the vehicle you’re selling, potentially the more important having great images will be online, especially when selling a vehicle without an on-site inspection or without having a third-party evaluating the potential purchase.
And that should result in a higher selling price. After all, this is the end game.
